Adding Cloudlabs Template for AWS Based Labs
Overview
CloudLabs Template is the base of the Hands-on Lab environment. You can do a variety of configurations under CloudLabs Templates such as adding pre-requisites, enabling custom policies for users, and much more.
In this document you will be going through below topics:
1. Add CloudLabs AWS Template
2. AWS CloudFormation Template
3. Enable EC2 access Over Https
Here, you will learn more about how to work with CloudLabs Template.
Add CloudLabs AWS Template
- Click on the Following URL for a detailed documentation on how to add a CloudLabs AWS template: How to Add a CloudLabs AWS Template
AWS CloudFormation Template
As the name suggests, you will provide the CloudFormation template files here to provision your lab environment.
CloudFormation template file: The CloudFormation Template is a JavaScript Object Notation (JSON) file that outlines your project's infrastructure and settings. The resources required for deployment as well as their properties must be specified in the template.
A CloudFormation Template has the following sections:
Parameters - In the parameters section of the template, you specify which values you can input when deploying the resources.
Resources - In the resources section, you define the resources that are deployed.
Outputs - In the outputs section, you specify values that are returned from deployment. Typically, you return values from resources that were deployed.
For your reference, here is a sample CloudFormation Template:
- Sample cloudformation template: cloudformation template
- Parameter file: Rather than passing parameters as inline values in your CloudFormation Template, you can use a JSON file that contains the parameter values. The parameter names in the parameter section of your CloudFormation template and Parameter file must match.
For your reference, here is a parameter file sample:
- Parameters File: Parameters File
Note: The sample template given above uses Amazon Linux AMI(Amazon machine image) for EC2 instance which is one of the quick start AMI provided by AWS, you can also create your own Custom AMI using following documentation: Custom AMI or Amazon Machine Image Creation
- Steps to choose a built-in AMI:
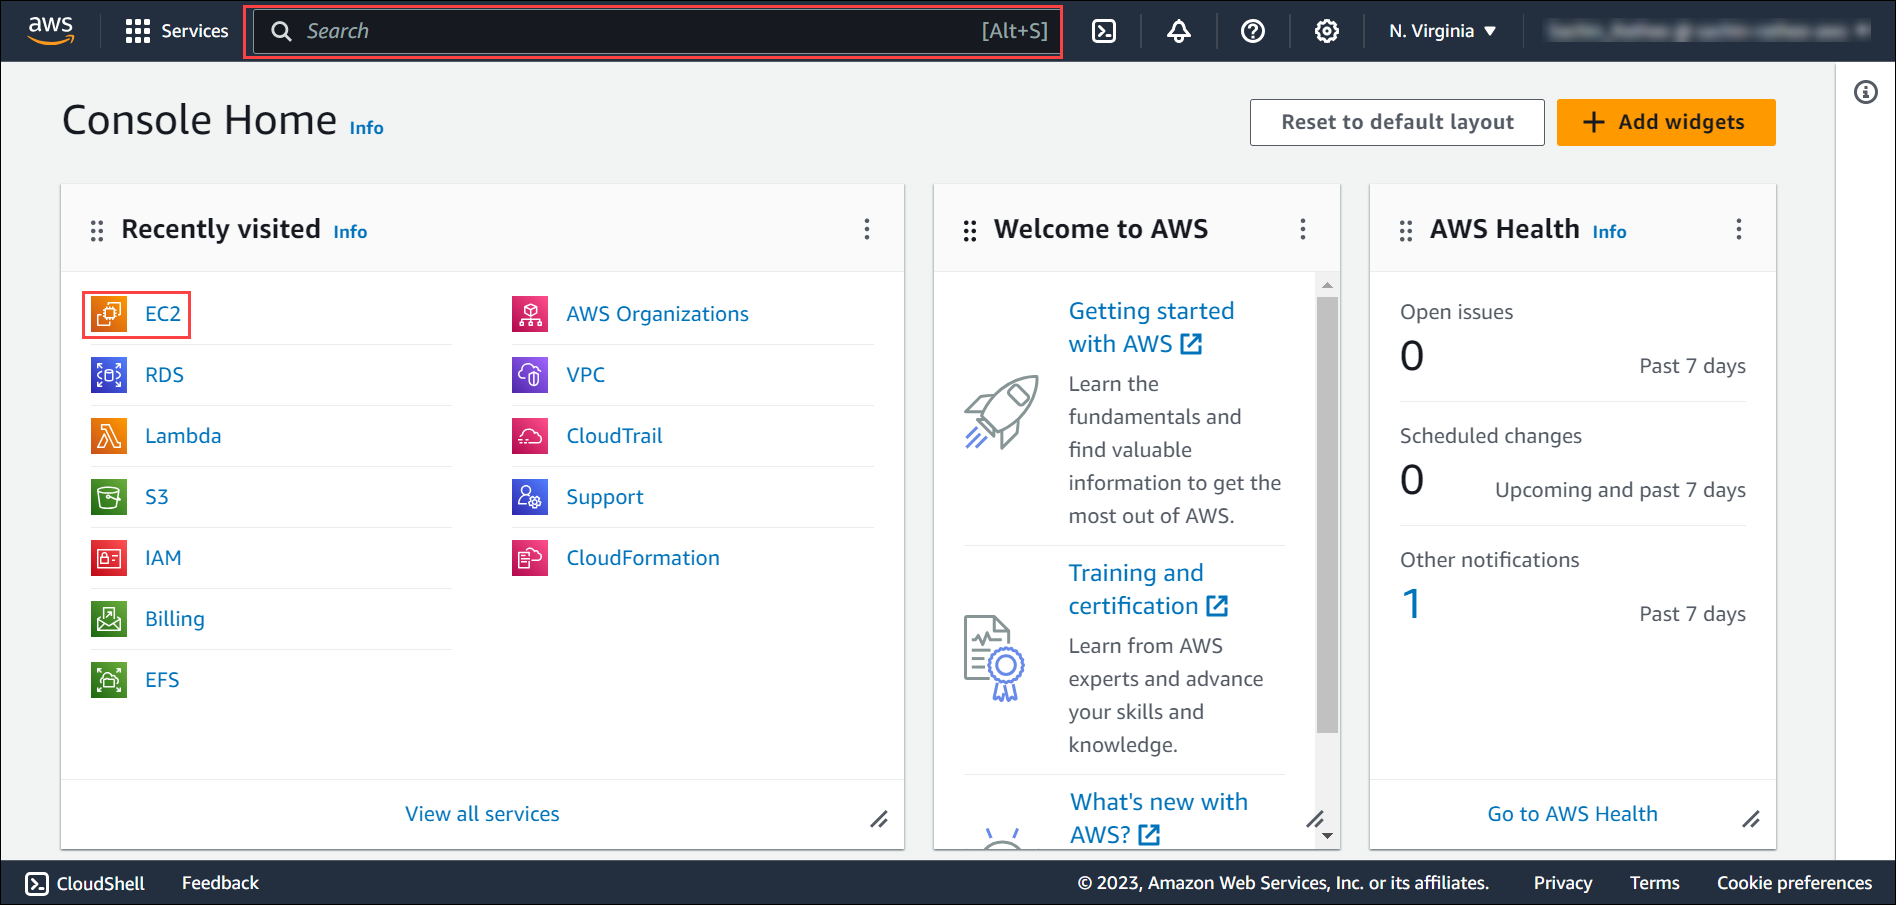
- In the AWS Console, navigate to the search bar and type "EC2" or choose it from the "Recently visited" section, if available.
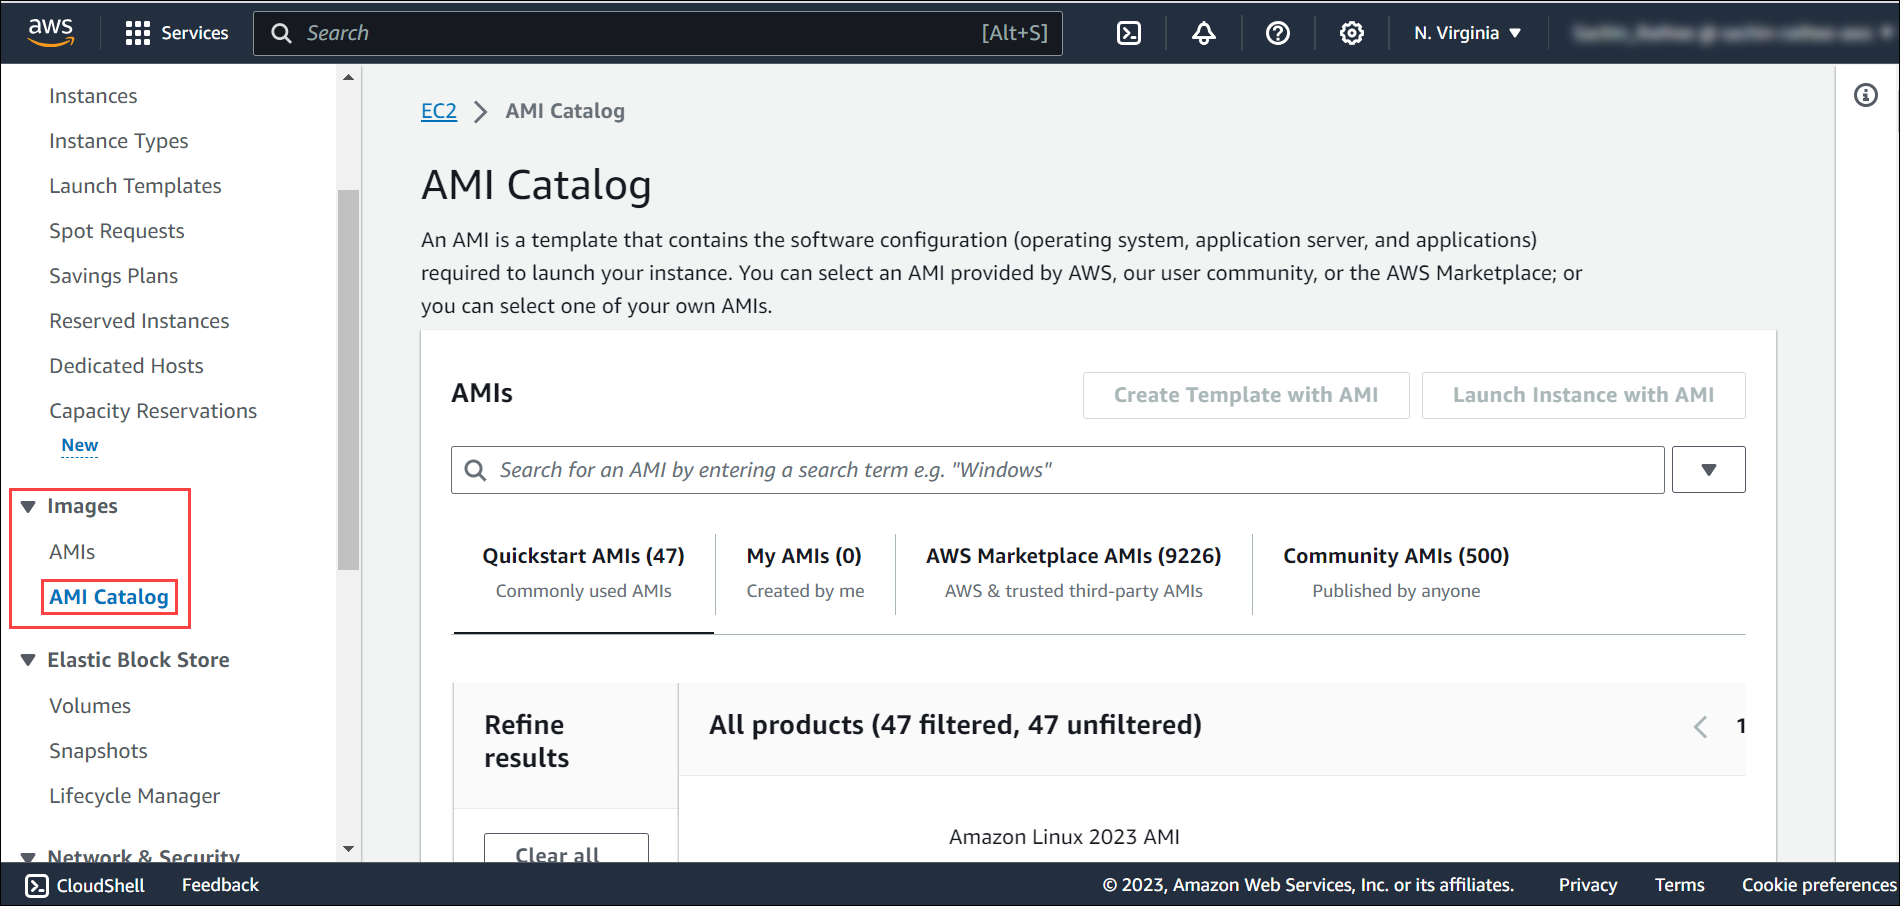
- In the EC2 Page, choose "AMI Catalog" under "Images" section on the left hand side pane.
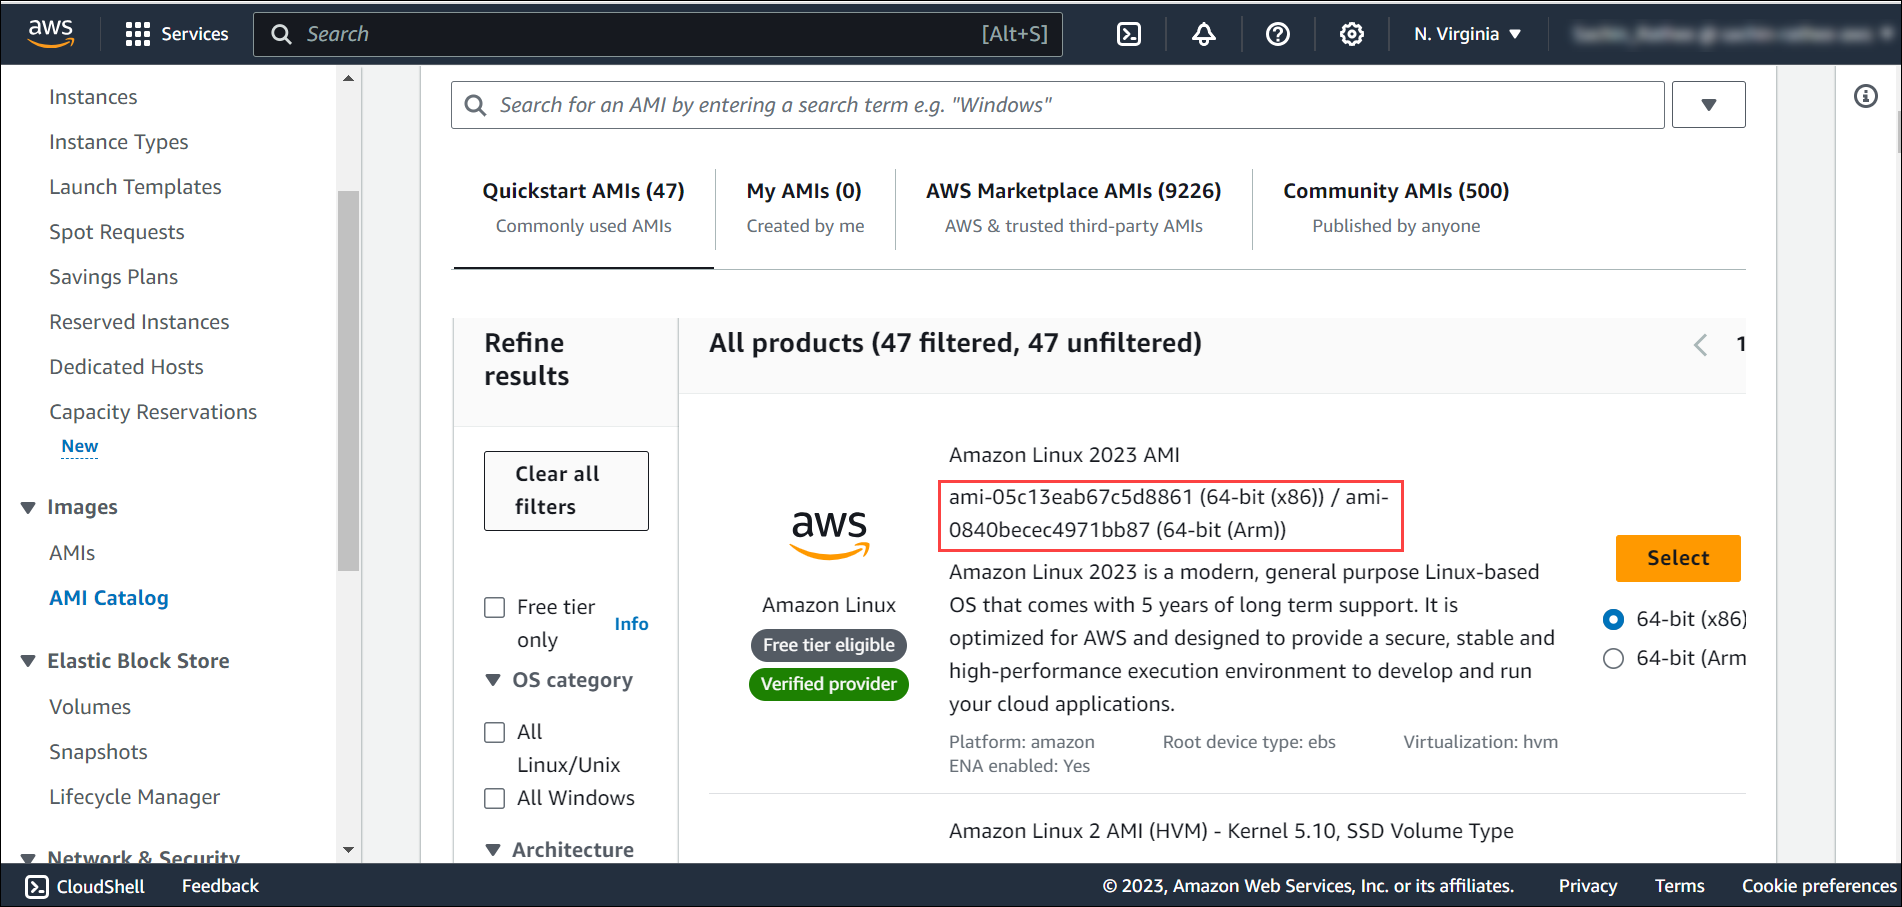
- Select the required AMI from the list of built-in AMIs provided by AWS and note its AMI id.
- In the AWS Console, navigate to the search bar and type "EC2" or choose it from the "Recently visited" section, if available.
Alternatively, you can also follow the given steps:
- In the AWS Console, navigate to the search bar and type "EC2" or choose it from the "Recently visited" section, if available.

- In the EC2 Page, choose "Instances" under "Instances" section on the left hand side pane.
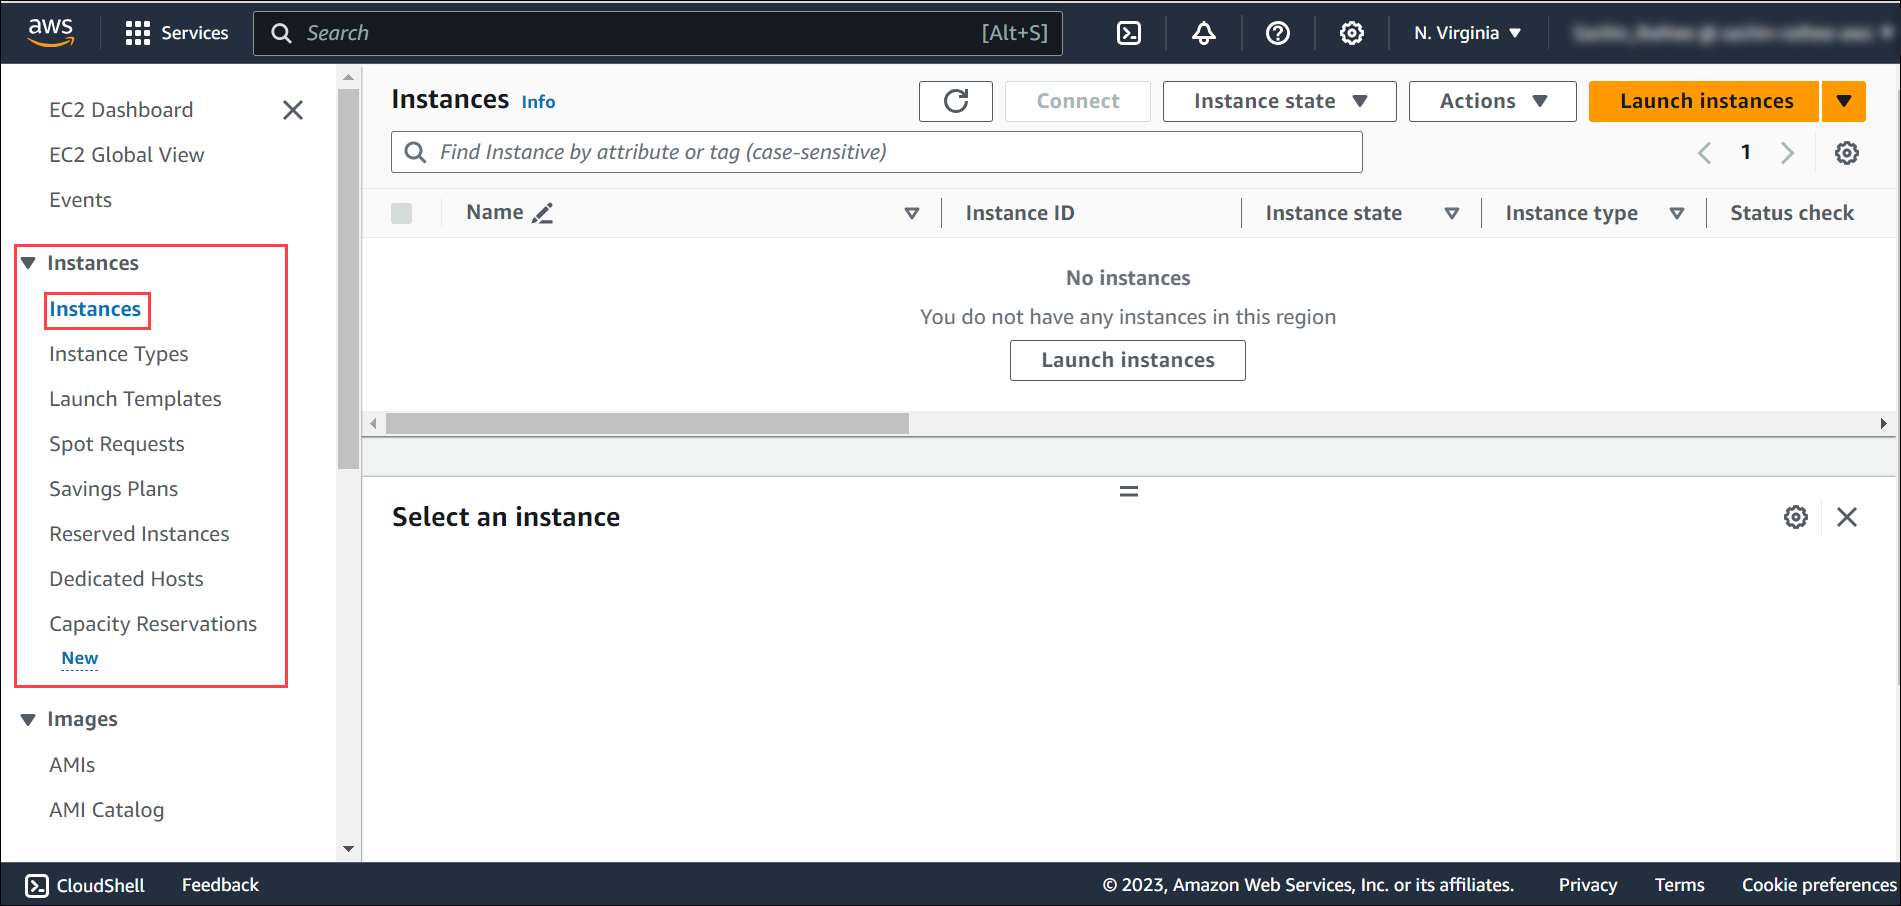
- Click on "Launch Instances" to launch a new instance.
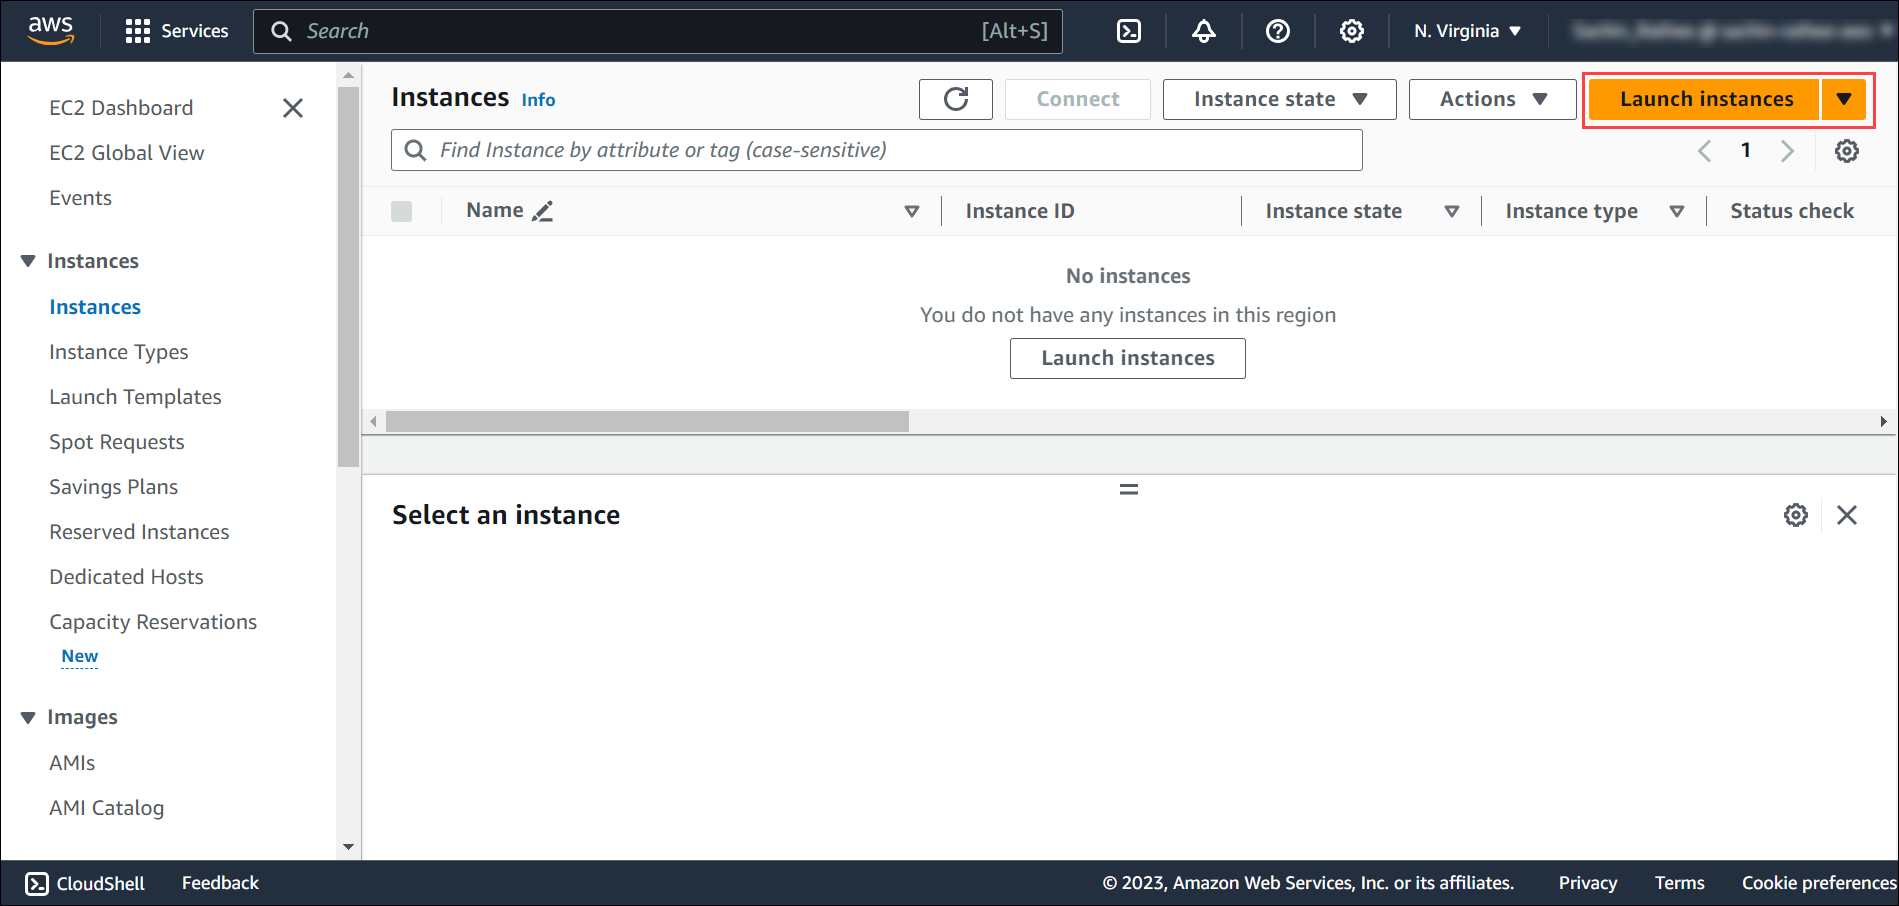
- Under "Application and OS Images (Amazon Machine Image)", choose your preferred AMI fron the quick start and find its AMI id below its name or click on "Browse more AMIs" to choose from more built-in images.
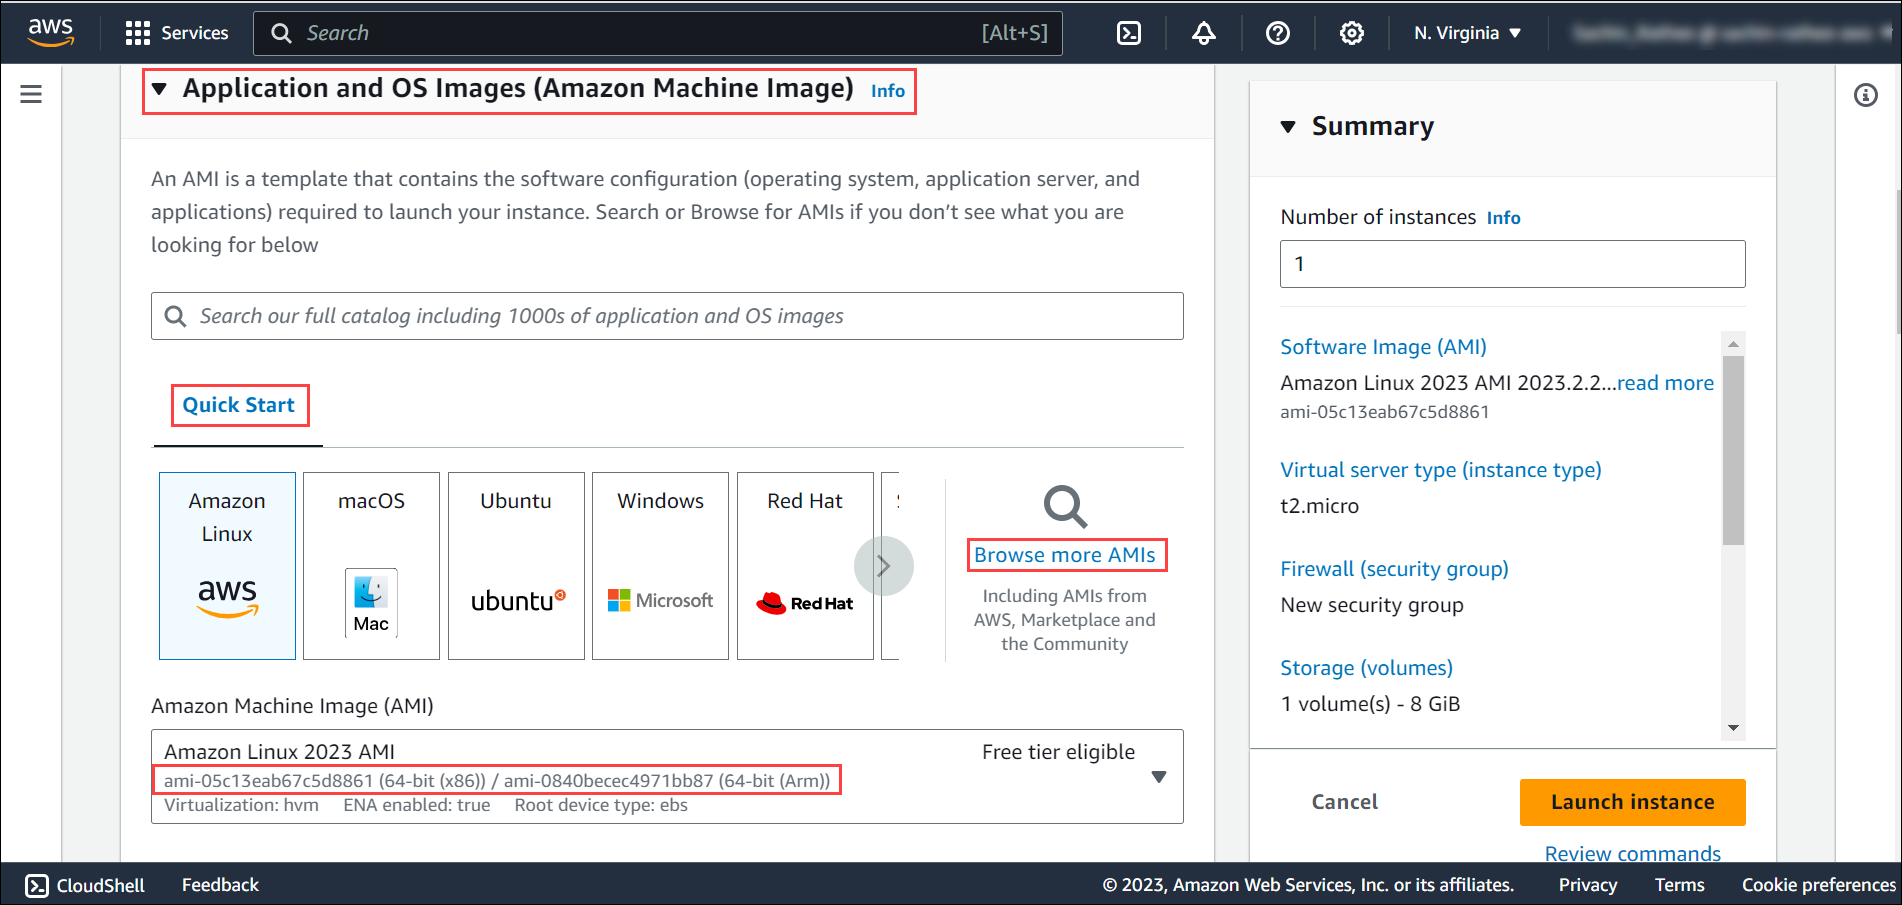
- Browse through the given list of AMIs and take note of the AMI Id of your preferred image.
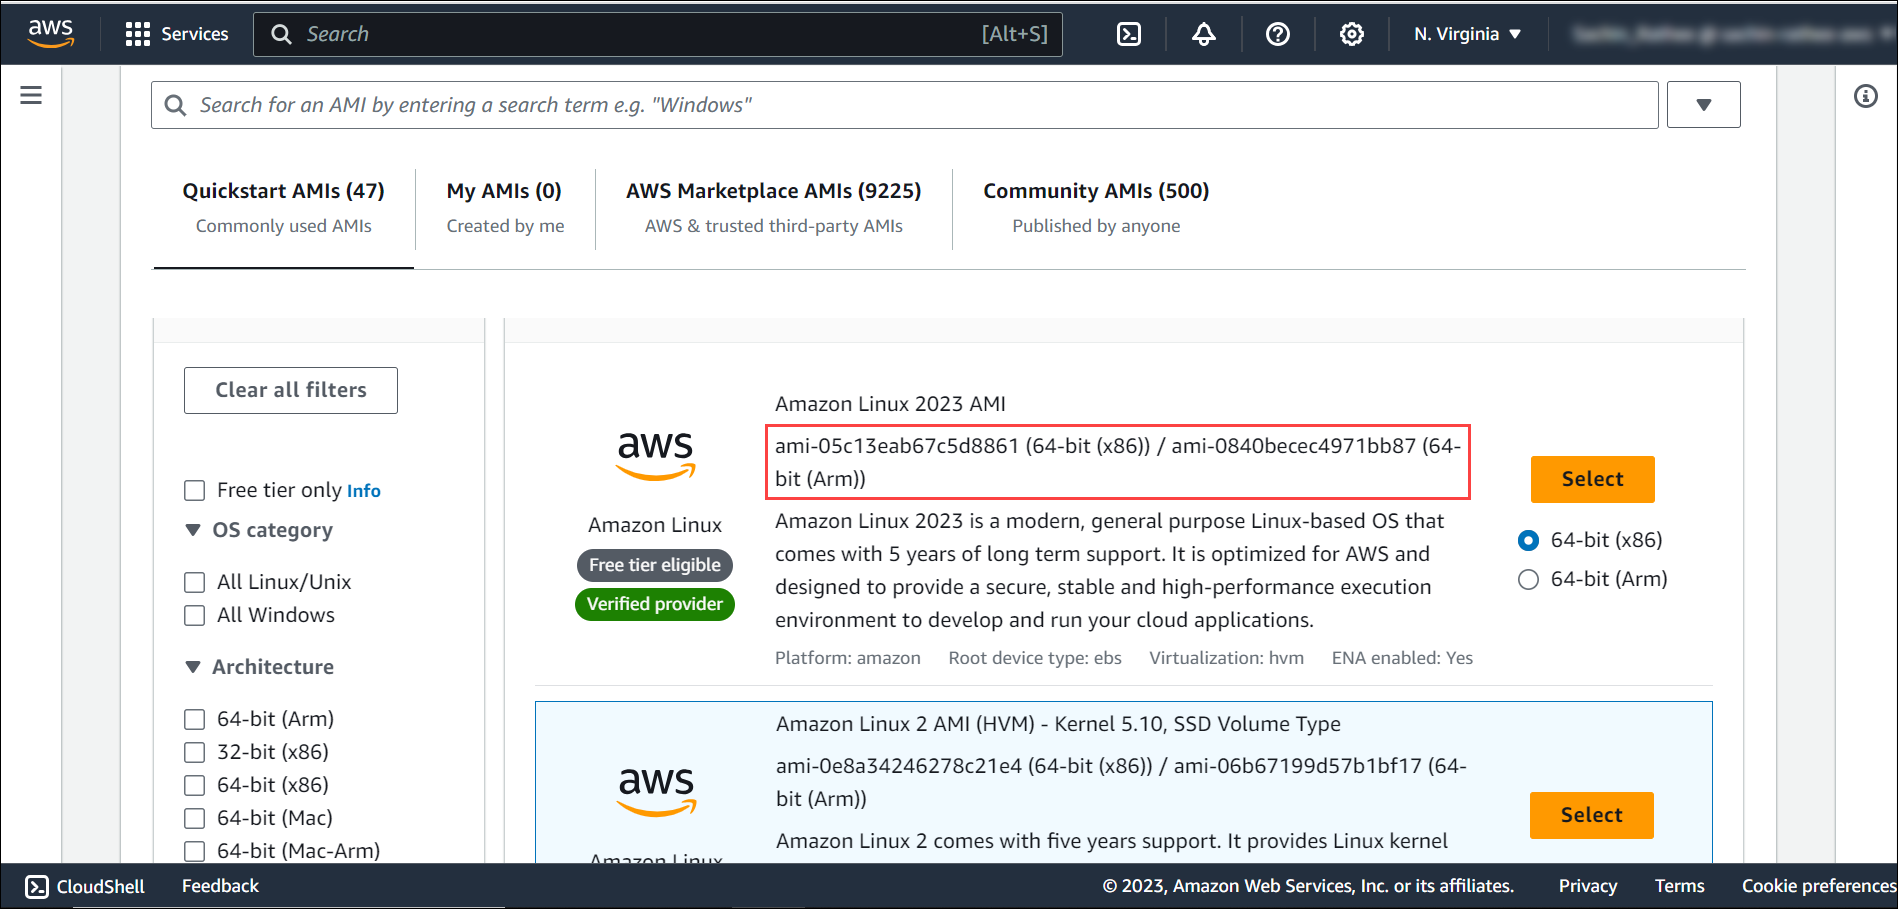
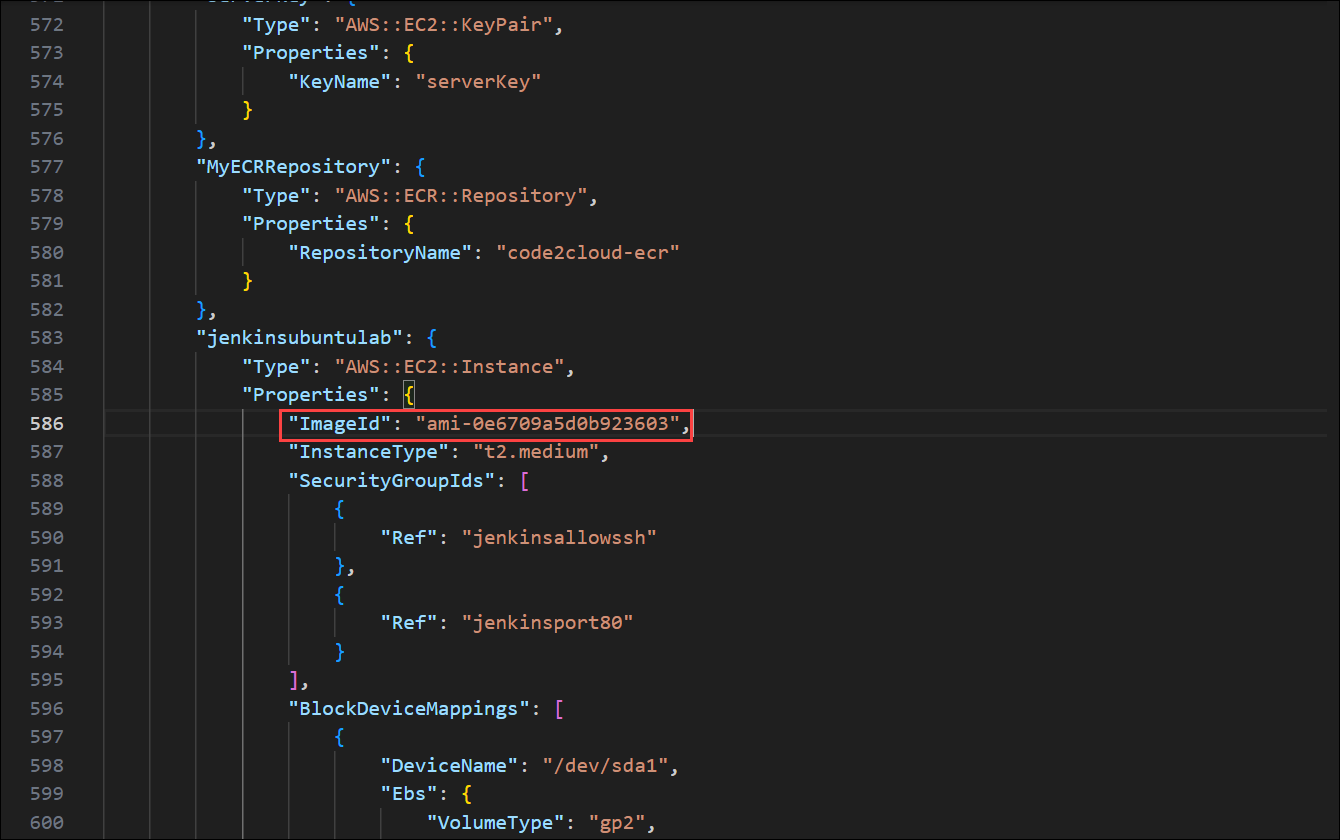
- After copying the AMI Id of your preferred built- in image, replace it in the following section of the Cloudformation Template:
EC2 User Data Scripts: You can run Bash or Powershell Scripts while your EC2 instance boots up refer below Script that will enable password Authentication For AWS Linux Instance and Windows VM.
For linux EC2 Instance:
"UserData": {
              "Fn::Base64": {
                          "Fn::Sub": "#!/bin/bash\nsed 's/PasswordAuthentication no/PasswordAuthentication yes/' -i /etc/ssh/sshd_config\nsystemctl restart sshd\nuseradd ${VMUserName}\necho -e \"${VMPassword}\\n${VMPassword}\"  |  passwd ${VMUserName}\n"
                      }
            }
For Windows EC2 Instance:
"UserData": {
              "Fn::Base64": {
                      "Fn::Join": [
                          "\\n",
                          [
                              {
                                  "Fn::Sub": "<powershell>\nRename-LocalUser -Name \"Administrator\" -NewName \"${VMUserName}\"\n$Password=ConvertTo-SecureString \"${VMPassword}\" -AsPlainText -Force\n$UserAccount = Get-LocalUser -Name \"${VMUserName}\"\n$UserAccount | Set-LocalUser -Password $Password\n</powershell>\n"
                              }
                          ]
                      ]
                  }
            }
Note: The CloudFormation Template & Parameter files must be stored in the S3 Storage Bucket. The storage bucket and the objects must be publicly accessible, steps to make a bucket public are described here Creating a Bucket with Public Access once the files are uploaded you can retrieve the URL & provide it in the CloudFormation details tab in the CloudLabs Template. CloudLabs supports JSON or YAML file format.
To learn more about the CloudFormation Template, check Create and deploy your first CloudFormation Template.
Follow the steps below to get started:
Click on the + ADD button.

Fill up the below sections:
CloudFormation Template URL: Add the CloudFormation Template file URL here.
Parameter Template URL: Add the parameter file URL here.
Click on SUBMIT to save the configurations.

Enable EC2 access Over Https
Click on the Following URL for a detailed documentation on how to add a EC2 access over Https: How to enable EC2 access over Https
